
How to Create a Virtual Tour with a RICOH THETA Camera
To create a virtual tour with a RICOH THETA camera, capture a spherical still photo at each viewpoint, save the stitched equirectangular JPEGs, upload them to 360are, and connect the scenes. You can then add information hotspots, an interactive floor plan, and optional AI Chat before publishing.
This guide focuses on RICOH THETA X, Z1, SC2, and SC2 for Business. Other models can be used when their exported images meet the same upload requirements. RICOH supplies the capture tools; this workflow uses 360are for tour creation and hosting.
Capture → Save full 360° photos → Upload → Connect → Preview → Share
What You Need
Bring your THETA camera, a charged battery, available storage, and a stable tripod or monopod with a base. Use a supported RICOH app for remote capture and image transfer, or transfer files to a computer using the method supported by your camera and operating system. Keep backups of the originals.
Use the current RICOH360 app guidance for supported models. RICOH ended development support for the older THETA smartphone app in December 2024; older tutorials may show different controls.
If you already have exported panoramas, skip capture and follow creating a tour from existing 360° photos.
Choose a THETA Photo Workflow
| Camera | JPEG still-image dimensions | What to check |
|---|---|---|
| THETA X | 11,008 × 5,504 or 5,504 × 2,752 | Choose the image size before capture and compare detail with transfer time. |
| THETA Z1 | 6,720 × 3,360 | Use the stitched JPEG for a simpler workflow, or develop and stitch the RAW source separately. |
| THETA SC2 / SC2 for Business | 5,376 × 2,688 | Judge the original panorama in the viewer; enlarging it will not add captured detail. |
Dimensions are documented in RICOH’s THETA product specifications. These JPEG sizes fit 360are’s documented upload dimension range, although some are below its recommended 8,192 × 4,096 resolution. The recommendation is not the minimum.
Select still photography, not video. HDR and other processing controls depend on the model and selected format. For example, the Z1’s RAW + JPEG setting disables its Option Setting controls; do not assume that JPEG HDR and RAW capture have identical controls. See RICOH’s Z1 shooting settings.
For equipment tradeoffs, read the 360 camera guide. If you already own a THETA, test its output before deciding whether to replace it.
Step 1: Plan a Route Through the Space
List the entry, main rooms, connecting hallways, and relevant outdoor areas. Choose viewpoints that explain how those spaces connect. For a small property, begin with Entry → Living Room → Kitchen, then add a hallway and the remaining rooms.
Place the camera where doorways and useful room features are visible. Avoid a long jump between scenes when an intermediate viewpoint would help visitors understand the layout. Keep the camera height similar across the property.
Step 2: Capture the Panoramas
- Clean both lenses, straighten the support, and check the surroundings, including mirrors.
- Select a full 360° still-photo mode and take a test exposure.
- In a stationary interior, try the supported HDR setting and inspect bright windows and darker corners. Avoid movement while multiple exposures are captured.
- Trigger remotely or use a timer so you can move out of view.
- Review sharpness, horizon, seams, and exposure before moving to the next viewpoint.
- Record which file belongs to each room.
Keep nearby furniture and doorframes away from the camera when practical. Objects close to the lens boundary can produce stitching errors that are difficult to repair later. Choose a clear position rather than trying to solve every seam in editing.
Step 3: Save Full Equirectangular Images
Using the Camera’s JPEG Photos
Save the original full spherical photos, rather than screenshots of the viewer or cropped views. In the RICOH360 app, supported workflows let you select images in the THETA tab and save them to the phone’s library. RICOH’s transfer and save guide distinguishes saving to the app from saving a file to the phone.
Alternatively, copy the original JPEGs to a computer using your model’s supported transfer method. Open one transferred file and verify that it contains the entire scene as a 2:1 image. A share URL is not an image file for the 360are uploader.
Using THETA Z1 RAW Files
A RAW workflow adds processing steps. Develop the source DNG, stitch it into a complete spherical panorama using a compatible workflow, and export a final JPEG or PNG. Do not upload the unprocessed DNG or a dual-fisheye image directly.
RICOH THETA Stitcher generates 360° images from developed dual-fisheye JPEG/TIFF files and can run standalone or as a Lightroom Classic plug-in. Follow the software’s current instructions and preserve your originals. Changing a filename extension does not perform development or stitching.
Check the Final Files
360are accepts JPEG or PNG, full spherical equirectangular projection, and a 2:1 aspect ratio. The documented range is 4,096 × 2,048 through 16,384 × 8,192 pixels, with 8,192 × 4,096 or higher recommended. Follow any file-size limit shown by the uploader.
Keep native detail when resizing and avoid cropping away the ceiling or floor. A normal panoramic sweep is not necessarily a complete sphere. Review supported formats and dimensions before uploading a full batch.
Step 4: Upload to 360are
Sign in to 360are, open Asset Upload, and select one exported panorama. Wait for processing, then inspect it under All Assets. Look around in every direction and check the horizon and seams.
If the first image works, upload the remaining files. Use clear names such as Reception, Living Room, or Bedroom 1, and follow the upload instructions if processing fails.
Step 5: Build the Tour and Connect Rooms
Open VR Tour Editor → + Add Assets and select your panoramas. Arrange them so the intended entry panorama is first.
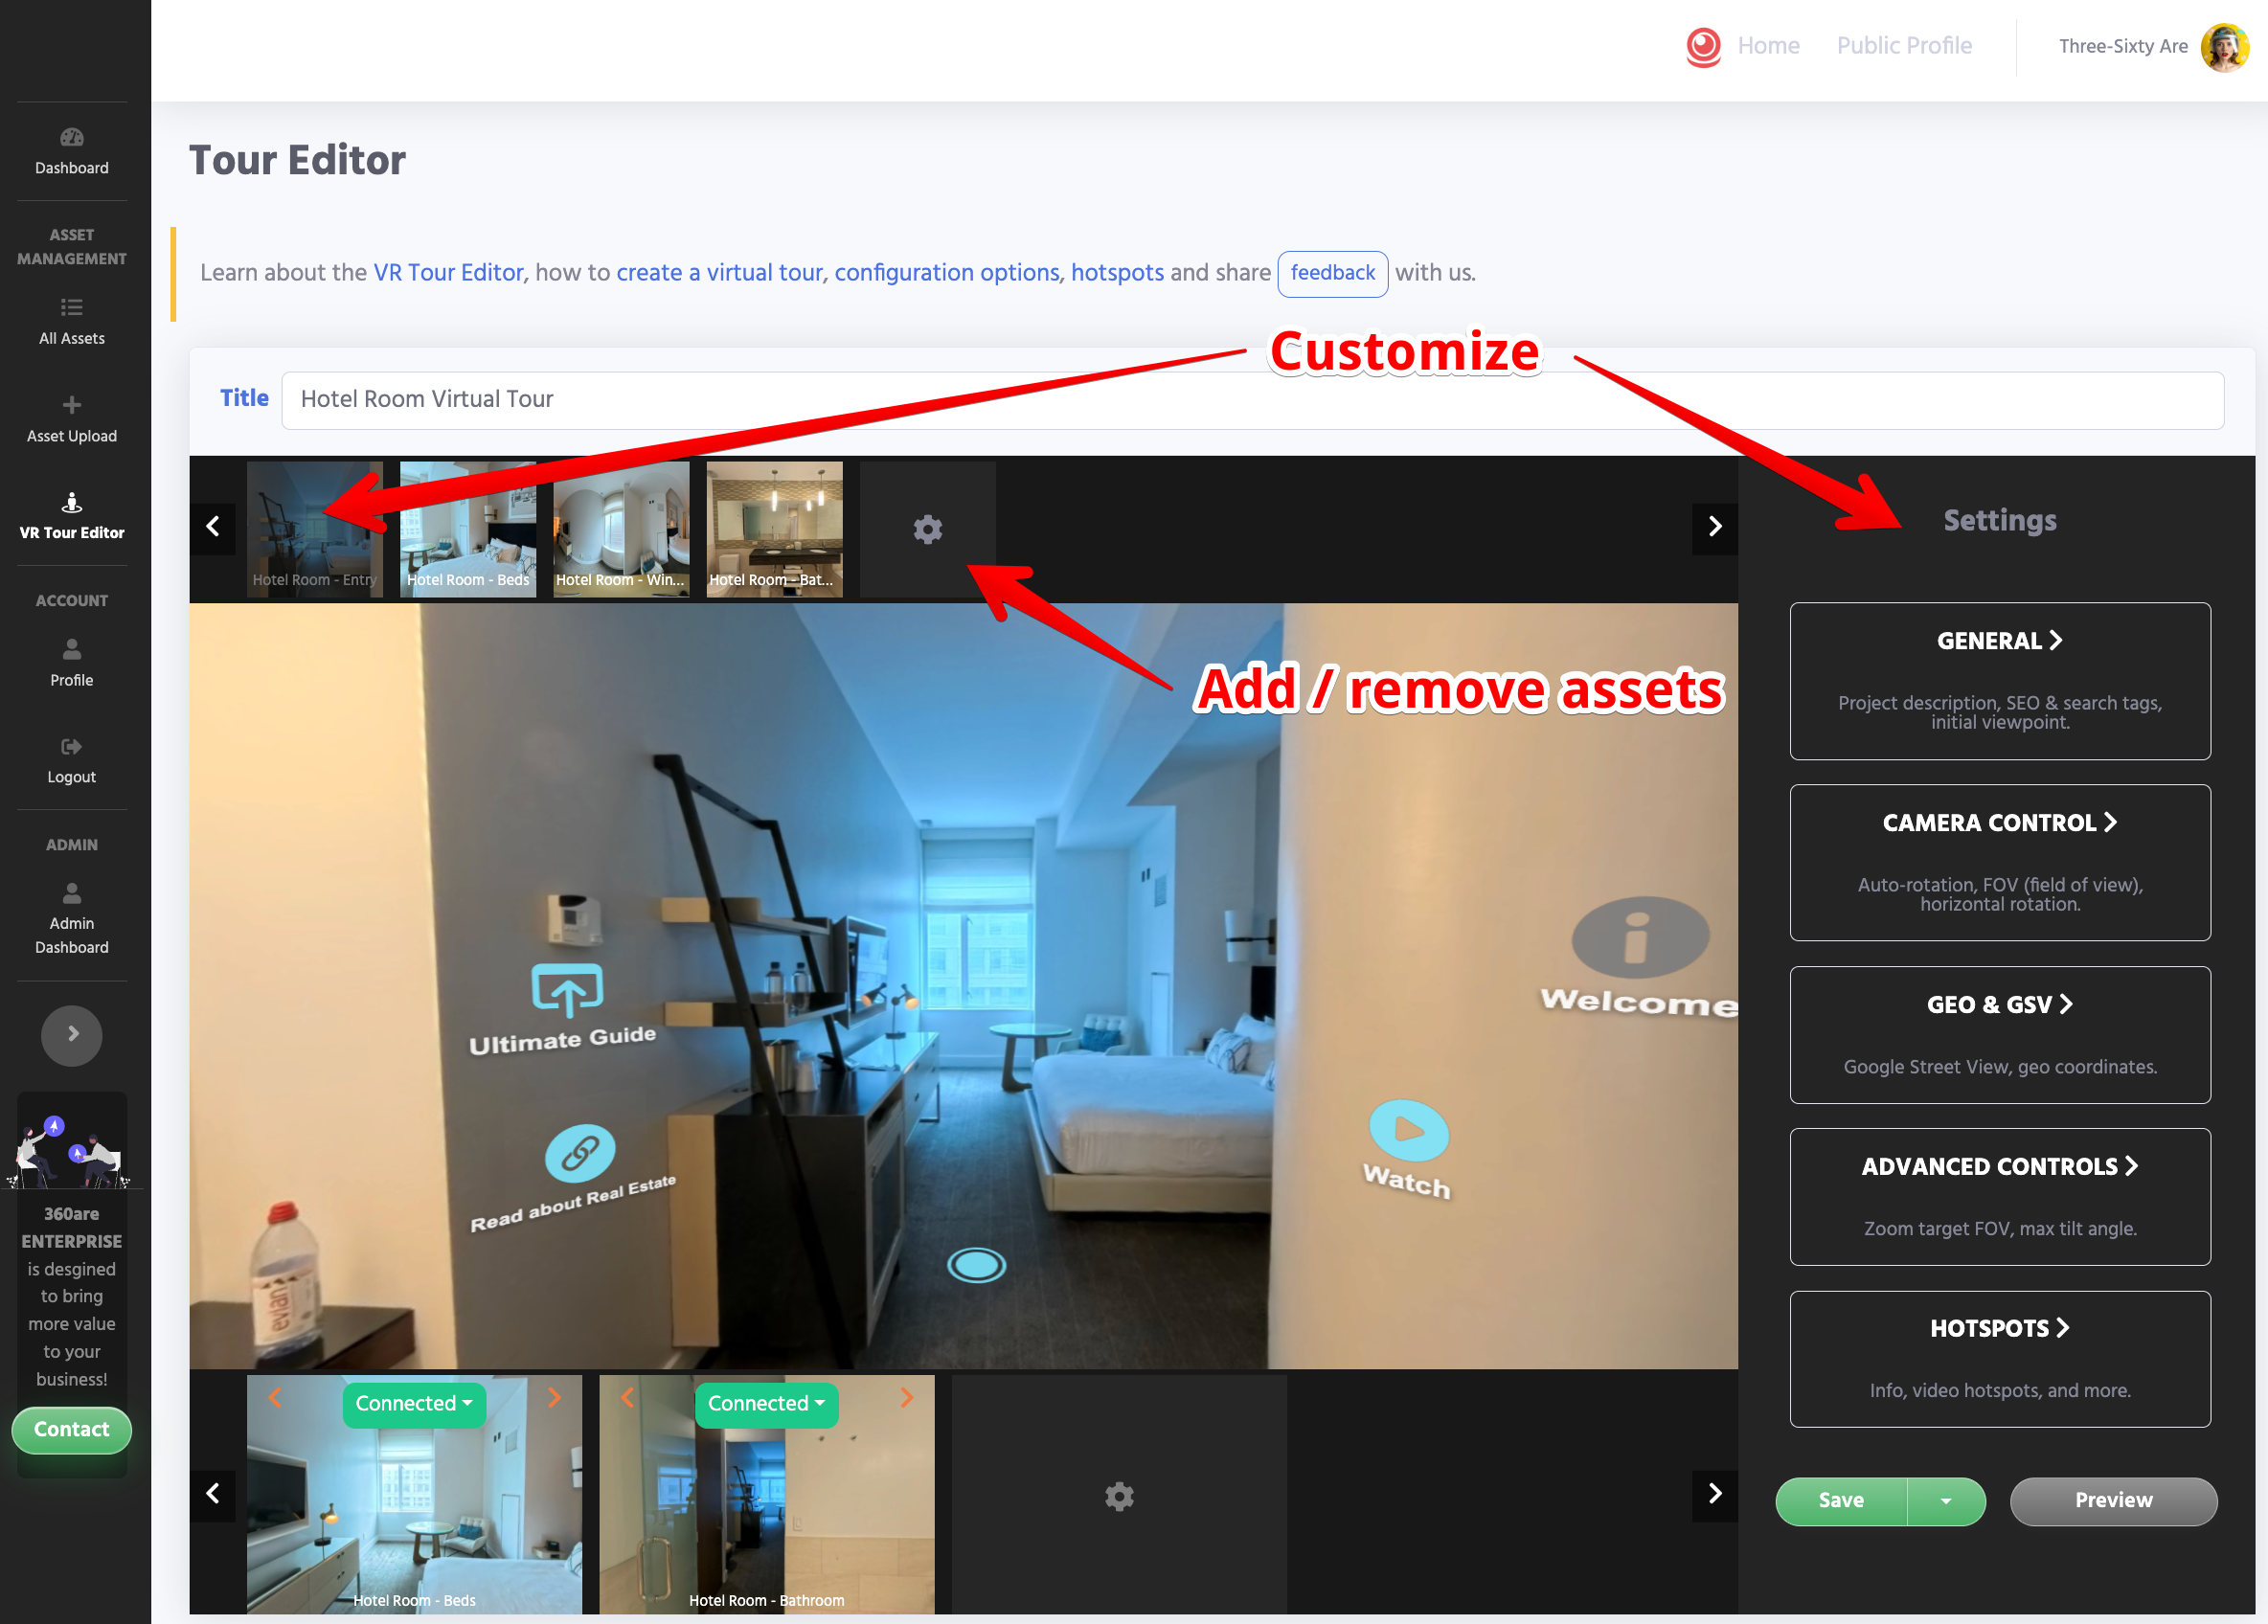
- Open the starting scene and select + Add Transition Scene & Hotspot.
- Choose the destination panorama and align the scenes to face the same direction.
- Select Disconnected → Add Hotspot, choose an icon and label, then Place Hotspot.
- Place the connection toward the actual destination, such as a doorway.
- Preview the move and check the return route. Add or repair reverse connections where needed.
Repeat until every intended room is reachable. Set a useful initial view and thumbnail. Scene order does not replace navigation connections; see the tour editor tutorial for the illustrated controls.
Step 6: Add Hotspots and Floor-Plan Navigation
Use information hotspots to explain a room feature or display relevant text or supported video content. Keep labels brief and avoid placing an information icon where visitors expect a room transition. The hotspot guide explains each type.
For an interactive floor plan on BUSINESS, open Settings → Advanced Controls → Interactive Floor Map → Open Floor Map Editor. Upload an existing drawing, place the scene markers at the camera positions, adjust their direction, apply, and save. Test each marker.
The floor-plan feature uses a drawing you provide. It does not measure rooms or automatically generate a floor plan or 3D dollhouse from THETA images. See interactive floor-plan setup.
Step 7: Prepare AI Chat
Add factual project descriptions, clear scene names, and relevant location information. Then find General → Enable AI Chat in the tour configuration. Use Validate AI Readiness if available, save, and test realistic visitor questions.
Check answers against the information supplied and verify any scene-navigation action. Keep ordinary hotspots available. AI Chat is included with BUSINESS or available as a PLUS add-on, subject to usage allowances and additional charges. Follow AI Chat setup and usage.
Step 8: Publish and Deliver
FREE lets you build and preview draft tours. Public publishing of a complete multi-scene tour requires PLUS or BUSINESS. Check 360are pricing and plan features before choosing floor plans, branding, or AI features.
Preview on desktop and mobile, then publish. Open the tour in its own tab and use Share to copy its Tour Link or Embed Code. Test the link while signed out and check the embed on the destination website. A copied draft URL does not publish the tour.
For eligible BUSINESS MLS delivery, use Copy MLS Link and check the receiving MLS’s requirements. Follow sharing and embedding and branded and unbranded delivery.
Google Street View: A Separate Publishing Step
PLUS and BUSINESS include publishing eligible individual panoramas to Google Street View. Connect Google, verify location and orientation, publish, and inspect the status and resulting Google view.
A multi-scene 360are tour is separate from a connected Street View experience. Do not promise that room connections, hotspots, floor plans, or AI Chat transfer to Google. The current documented workflow covers individual panoramas; connected multi-panorama publishing is not established by that workflow. See Street View publishing controls and limits.
Troubleshooting
| Problem | Check |
|---|---|
| Two circular fisheye views appear | Complete the stitching step, especially with Z1 RAW workflows. |
| Only one viewing angle was saved | Retrieve the original spherical JPEG instead of a screenshot or reframed export. |
| A Z1 or SC2 image is below the recommended resolution | Check it against the minimum; do not upscale just to match the recommendation. |
| Windows are bright and the room is dark | Review exposure or supported HDR settings and retake if necessary. |
| A doorway transition feels wrong | Align the scenes and check the hotspot’s location and destination. |
Frequently Asked Questions
Can I use a RICOH THETA with 360are?
Yes, when its exported panorama meets 360are’s format and dimension requirements. This is a file-upload workflow; it does not require a direct camera connection to the 360are editor.
Do I need to stitch every THETA JPEG again?
No. If the saved JPEG is already a complete stitched equirectangular panorama, inspect and upload it. RAW or dual-fisheye sources need an appropriate processing workflow first.
Can THETA Z1 and SC2 images be used even below 8,192 pixels wide?
Yes. Their listed JPEG sizes exceed the documented minimum width of 4,096 pixels. Judge the actual result in the tour viewer; higher dimensions created by enlargement do not add detail.
Do I need a RICOH360 Tours subscription to follow this guide?
This guide uses exported image files and 360are as the tour host. It does not depend on creating a tour in RICOH360 Tours. Separate capture, processing, or cloud tools may have their own account or software requirements.
Can I build a THETA virtual tour for free?
You can build and preview a draft on FREE. Publishing the complete multi-scene tour requires PLUS or BUSINESS. Individual-panorama sharing and complete-tour publishing have different plan rules.
Create Your First THETA Tour
Start with three connected viewpoints and one tested JPEG export. If you are comparing hosts, review the virtual tour software comparison, then check 360are plans.
Create your first tour free in 360are to build and preview your draft before choosing a publishing plan.